
GroupSpot was designed to give admins maximum flexibility and utility and this couldn't be more true than when it comes to posting. Read these 10 tips below and win your members over with your high quality posts.
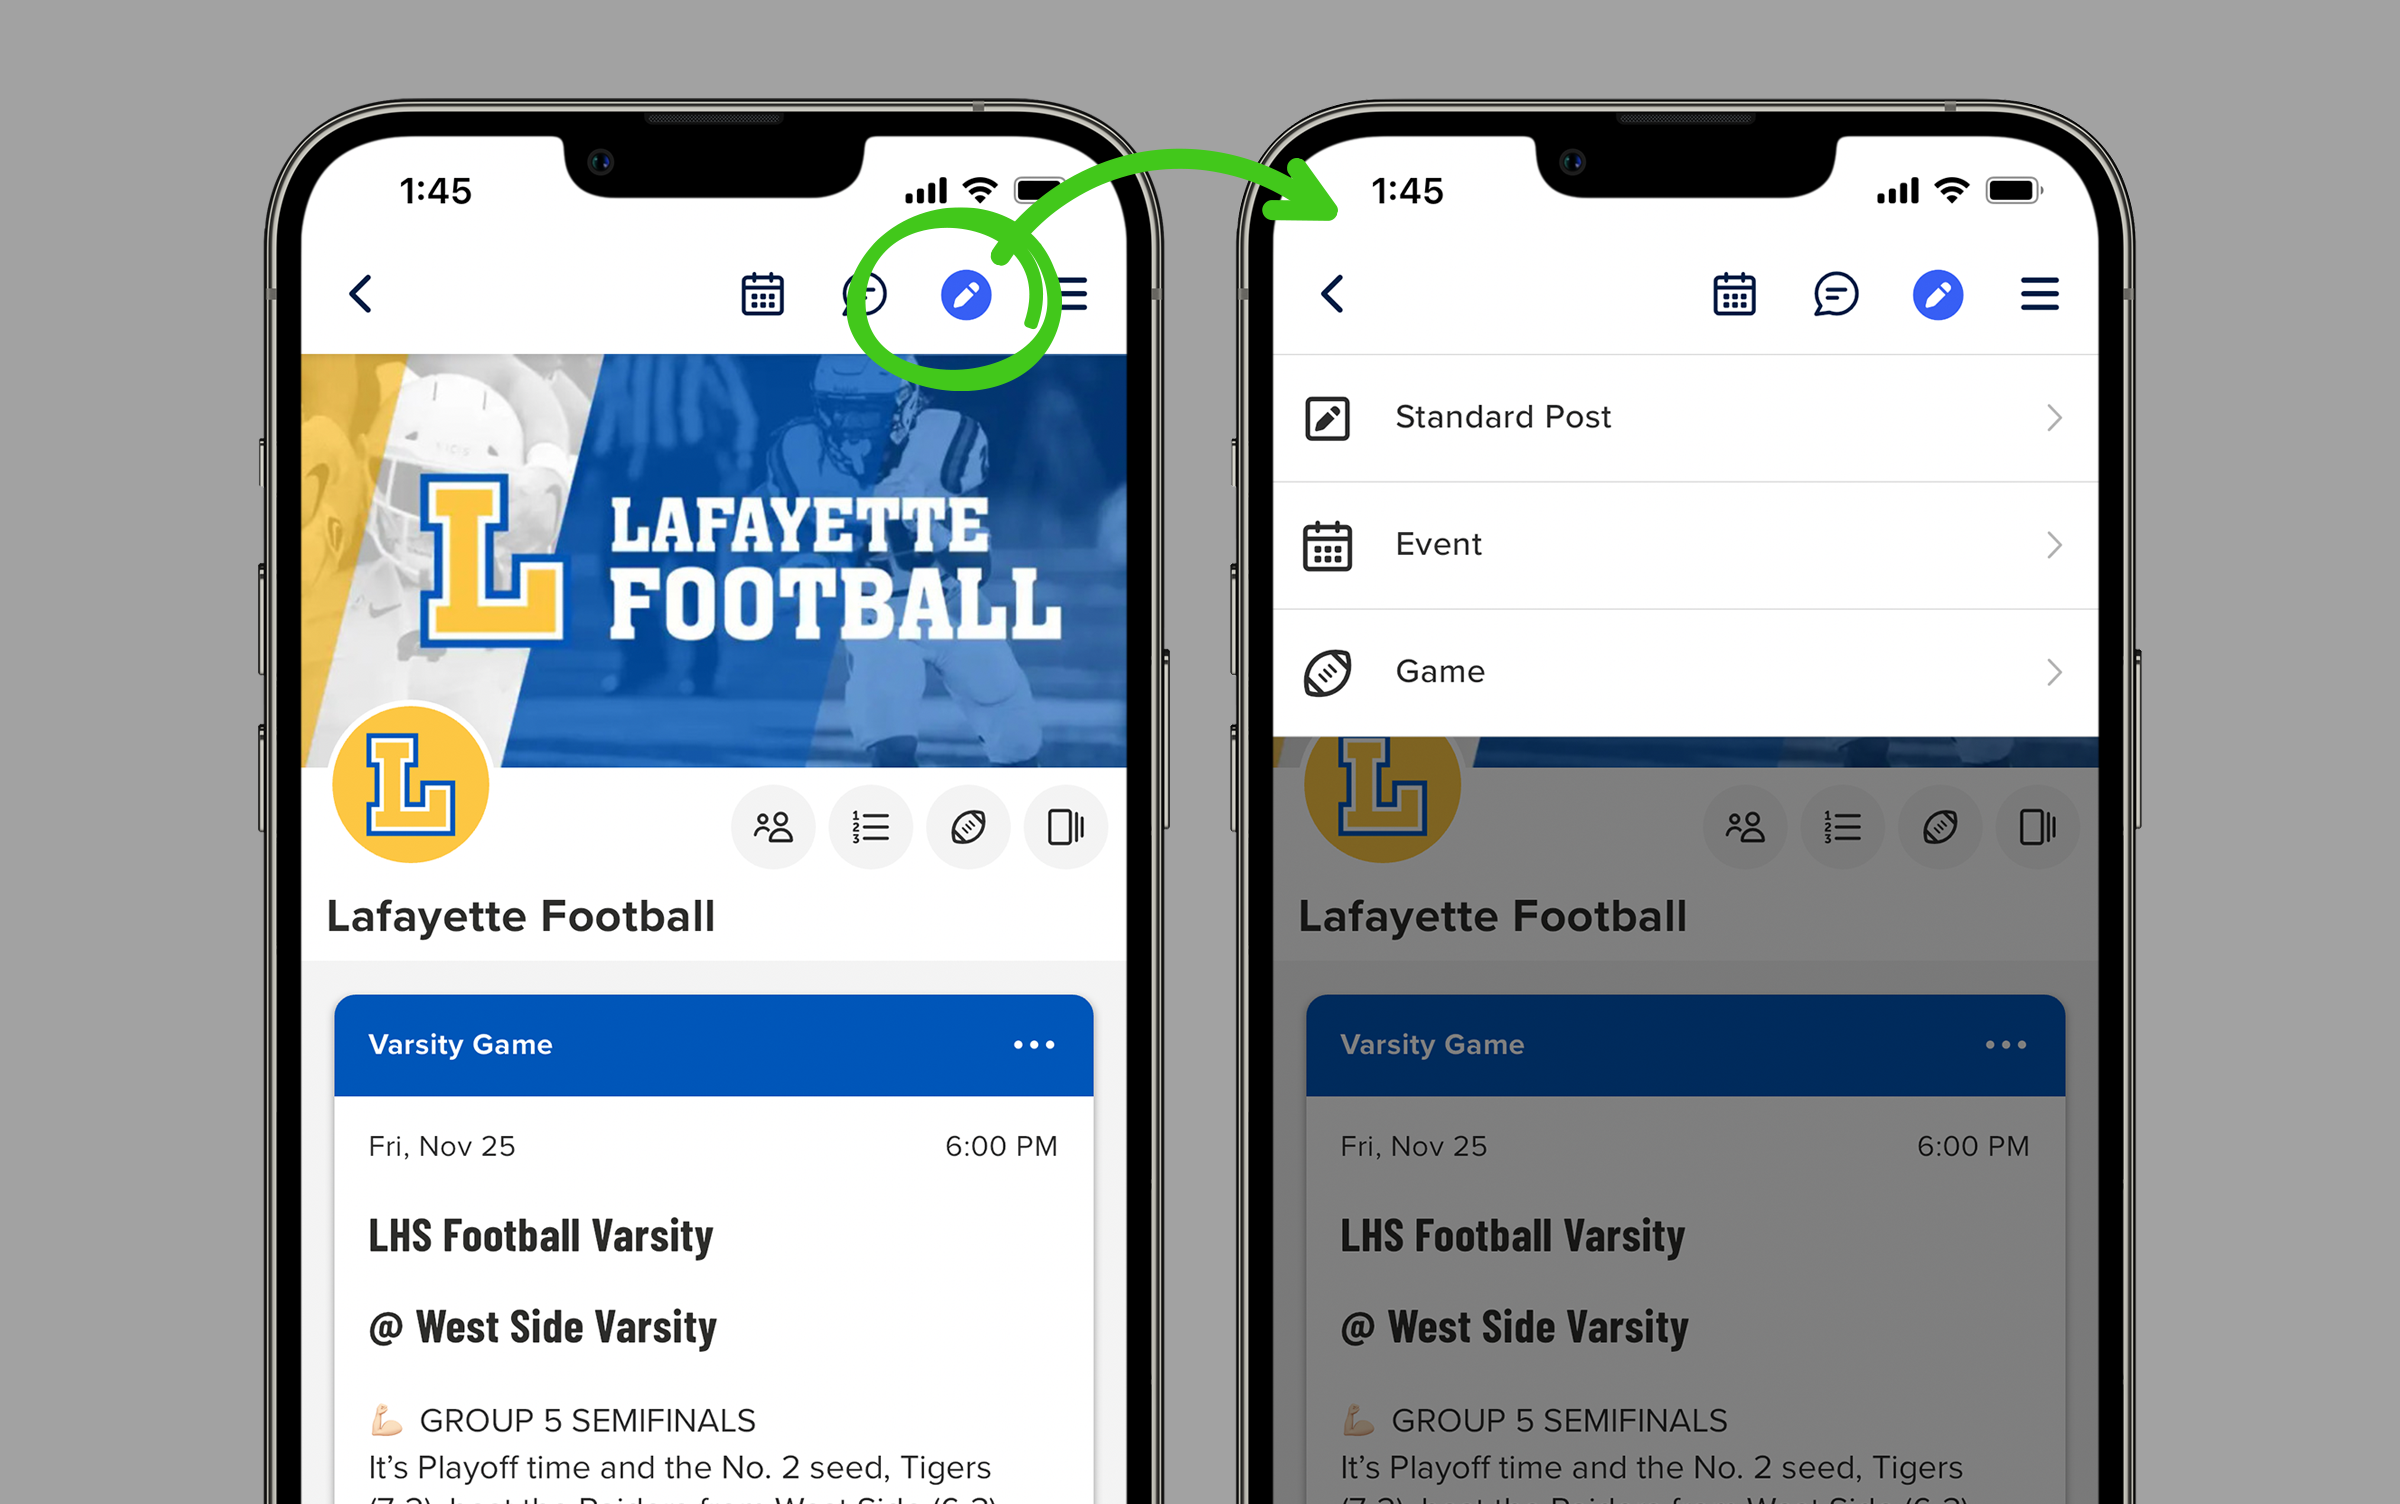
#1 Choosing the Correct Post Type
Start by creating a standard post or an event. A standard post is anything that isn't an event: they can be photo albums, signups, or even polls. An event is any activity with a date and time. It’s very important to make sure you add date and time to your events. Otherwise, they won’t appear on your calendar. If you’re a team, a third post type is available for when it’s time to add your games, meets, and competitions.

#2 Using Tabs to Change Your Post Type
If you accidentally choose the wrong post type you can easily switch post types from the tabs at the top of the screen. And when you make the switch, you don’t need to worry about losing what you’ve typed because everything transfers from one post type to the next without losing your text. Flexibility by design.

#3 Choosing the Right Post Author
GroupSpot gives group owners the option to post as the voice of the group or as themselves. For example, upcoming schedules and photo albums would normally come from the group whereas commenting on a post is more appropriate coming from the individual.

#4 Adding Photos and Video to your Post
Of course you can add your photos to posts but GroupSpot gives you the ability to make individual and shared photo albums. A shared photo album allows all members in your group to add to that album. Swipe through a shared album and watch the post author change depending on who added the photos. You can also click on albums to see your photos in grid view or cascade view. Further, you can add your favorite short-form video clips up to 60 seconds in length to any post. It’s often nice to see photo posts and a video together.

#5 Adding Other Great Content to Your Posts
In addition to your media, GroupSpot gives you the ability to add other great content to your posts like Attachments (up to three), Signups, Polls and Forms. They are easy to attach or create and extremely effective. You can also add Location and RSVP to any standard post, event, or game.
.gif)
#6 Creating an Event Post
Different from a standard post which is just a simple title and description, event posts have a completely different post creation form. You still have an event title and description, but you have many additional details you would want to include to post an event. This includes date and time, Location, RSVP, Status, and Reminders. You can also make the event a recurring event if it repeats. And you can decide where the post is displayed, either on your Feed and Calendar or Calendar Only.
.gif)
#7 Creating a Game Post (for teams only)
Like an event post, a game post also has a unique form. Unlike standard posts and events where you have your post title up top, here you have your opponent if head-to-head or competition name if you have multiple opponents. Otherwise a game post will mirror many of the same attributes of an event post such as date and time, Location, RSVP, Status, and Reminders.

#8 Displaying on Feed & Calendar or Calendar Only
This is one of the most important details when creating events and games for teams. You have the choice whether you want your post to hit the Feed & Calendar or Calendar Only. Generally speaking, near term events often publish to the Feed & Calendar while longer lead events can live on the Calendar Only. When the event nears, it is easy to move the post from your calendar to your feed and back if necessary. Your feed is dynamic and you control what you want to make the focal point at the top of your feed as well as what should live on the calendar.
.gif)
#9 Turning off the New Post Notification
New posts automatically generate a new post notification by default. But there will be times when posting late night or early morning when you want to turn this off. The post silencer allows you to disable the new post notification.
.gif)
#10 Saving Your Post as a Draft
Just like email, GroupSpot lets you save your posts as drafts when you’re not ready to publish. This is especially helpful when you are crafting a long post and need to save a draft for later.

BONUS: I’ve Posted, Now What?
Once you’ve posted your content, the good news is that every post has a three dot menu ··· on the top right corner of the post. When selected, a drawer pops up with options to choose from. You can edit your post by adding new information or correcting a typo, you can pin the post, you can move the post to the top of the feed by bumping it, you can duplicate it by cloning it, you can bookmark it, or delete the post altogether. Plenty of options for handling your new post.
