Forms are incredibly helpful to gather information from your group members. They can be used in a variety of ways including program registration, health waivers, permission slips, or even merchandise orders. And they can be added to any post type.
1. From the create post screen, start by giving your post or event a title, description, and add any optional details.
2. Press the + icon at the bottom right corner of your screen to add to your post. Select Form from the menu of options and start by giving your form a name.

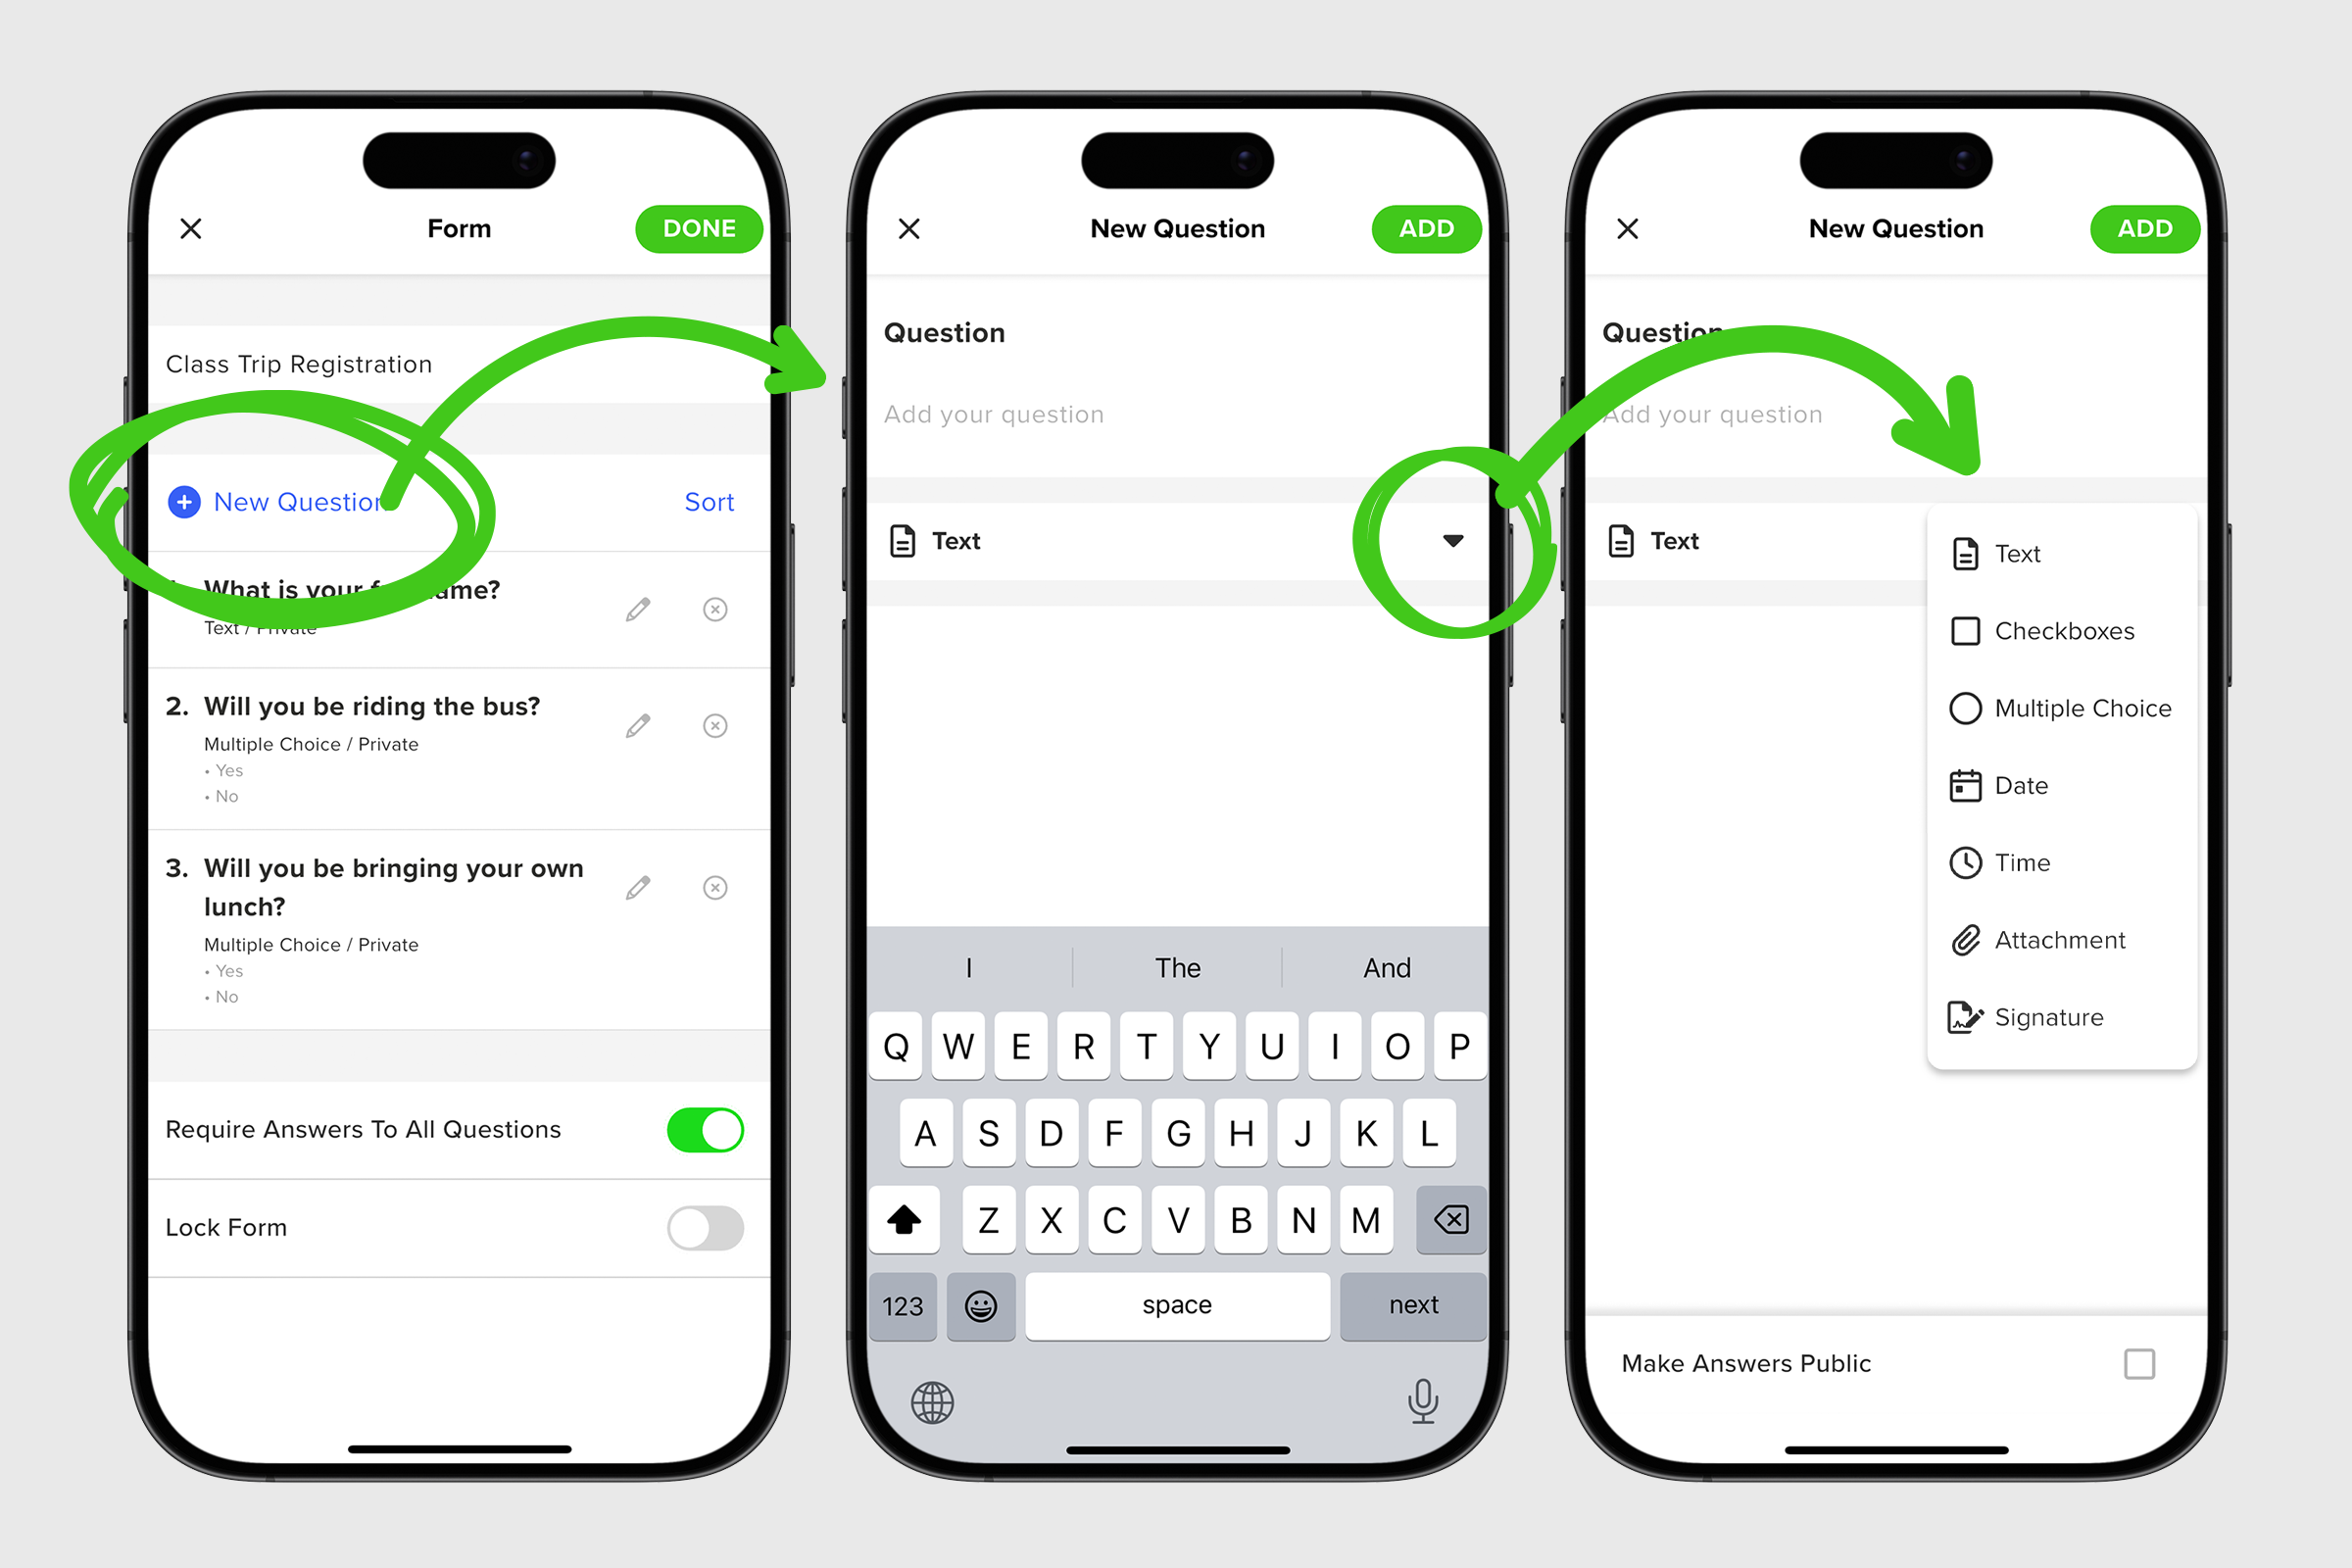
3. Next choose the New Question prompt to start your form. Use the dropdown to choose your question type from the list of options: text, checkboxes, multiple choice, date, time, attachment, and Signature. Your answers will remain private unless you click the Make Answers Public box and then select DONE.
4. Repeat these same steps as you build out your custom form. Feel free to mix and match question types.

5. Once you’ve filled in your form, select DONE to return to your create post screen where you will see your new form attached to your post.
6. When everything is in order, select Post to publish.

