


There comes a time, even with the most storied and successful groups, leadership has to transition at the top. A season ends, a term expires, or maybe it’s just time for new blood, regardless of the change, the best groups carry on with a new leadership team.
As part of this transition, it’s important for existing Owners and Admins to be able to easily step down when their time has ended. It’s also equally important that the new Owners and Admins can run their group without worrying about previous Owners and who has access to what admin privileges. Your members don’t want to see previous Owners listed at the top of your membership directory or your group details. It’s not fair to the current leadership running the group going forward.
The good news is that stepping down from Owner to Admin or Member is easy to do. The only thing to keep in mind is that you’ll need at least one other Co-Owner in place before stepping down, ensuring a smooth transition. Let’s look at both scenarios: stepping down when there are multiple Owners and stepping down as the sole Owner.
Multiple Co-Owners
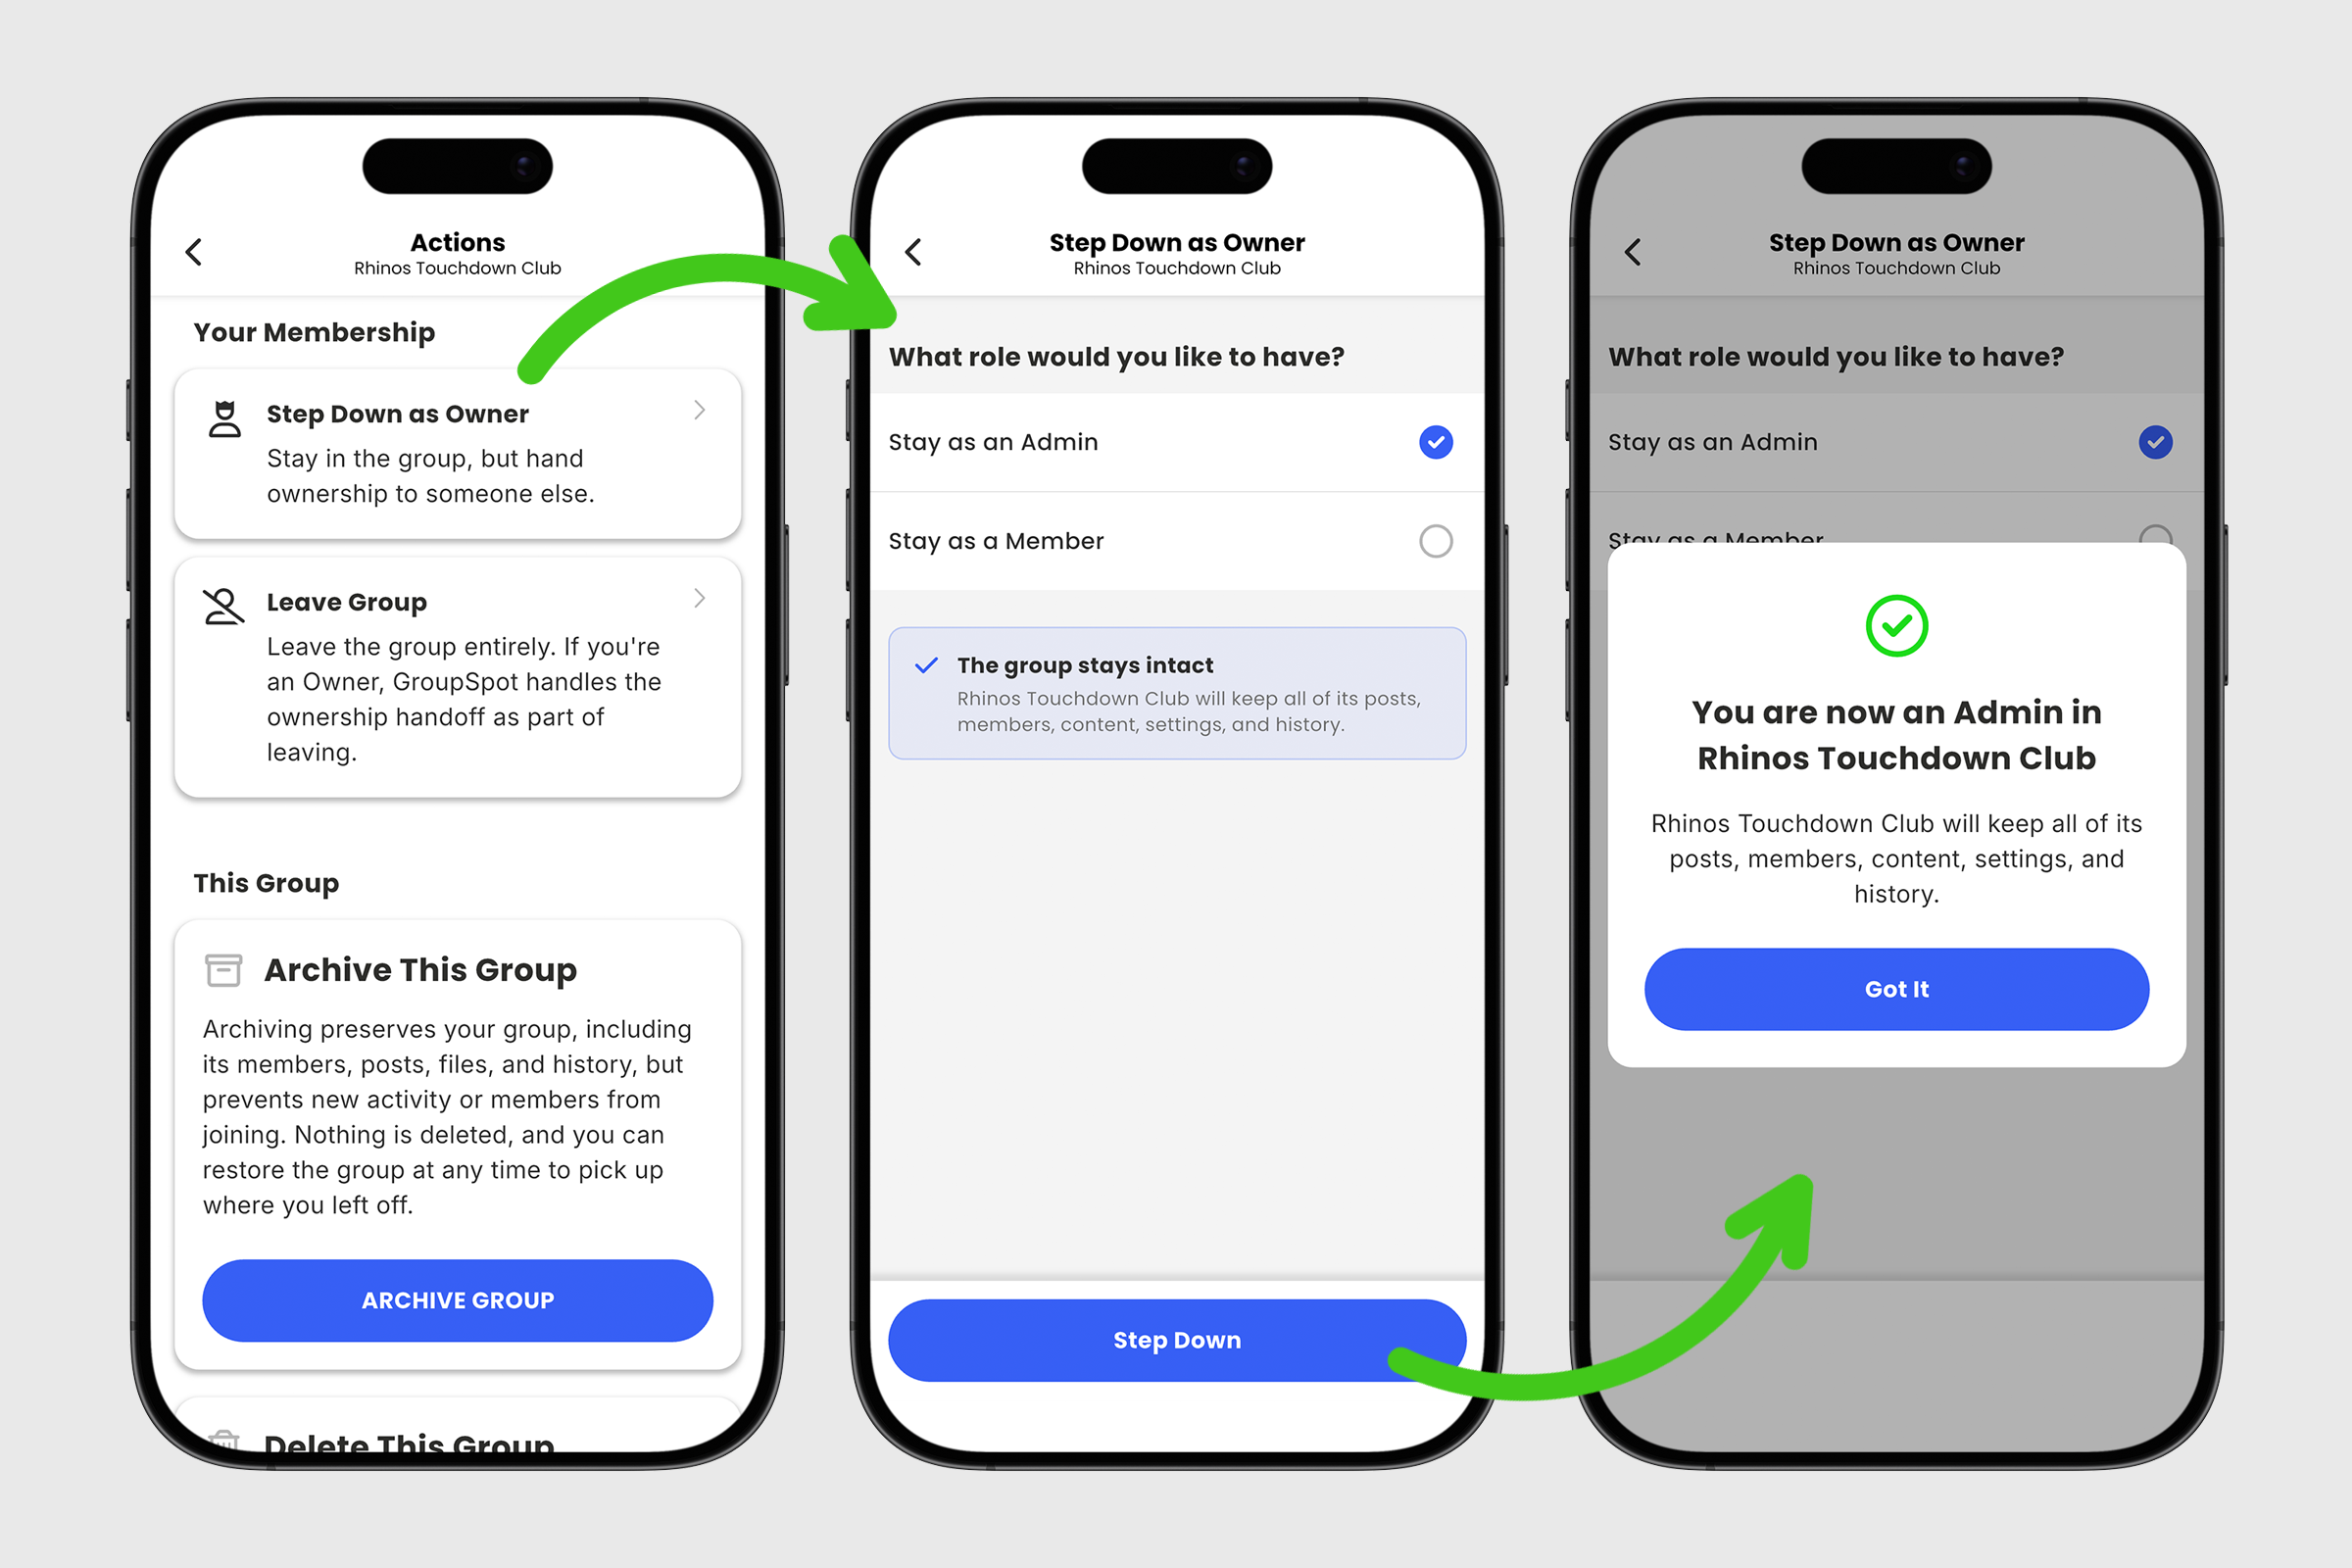
When you have multiple Owners running a group, stepping down is pretty simple. From your Group Settings, choose Owner Actions at the very bottom of the list. From there, you can choose Step Down as Owner and select whether you want to remain in the group as an Admin or Member. If you decide to leave the group altogether, simply choose Leave Group instead.
Single Owner
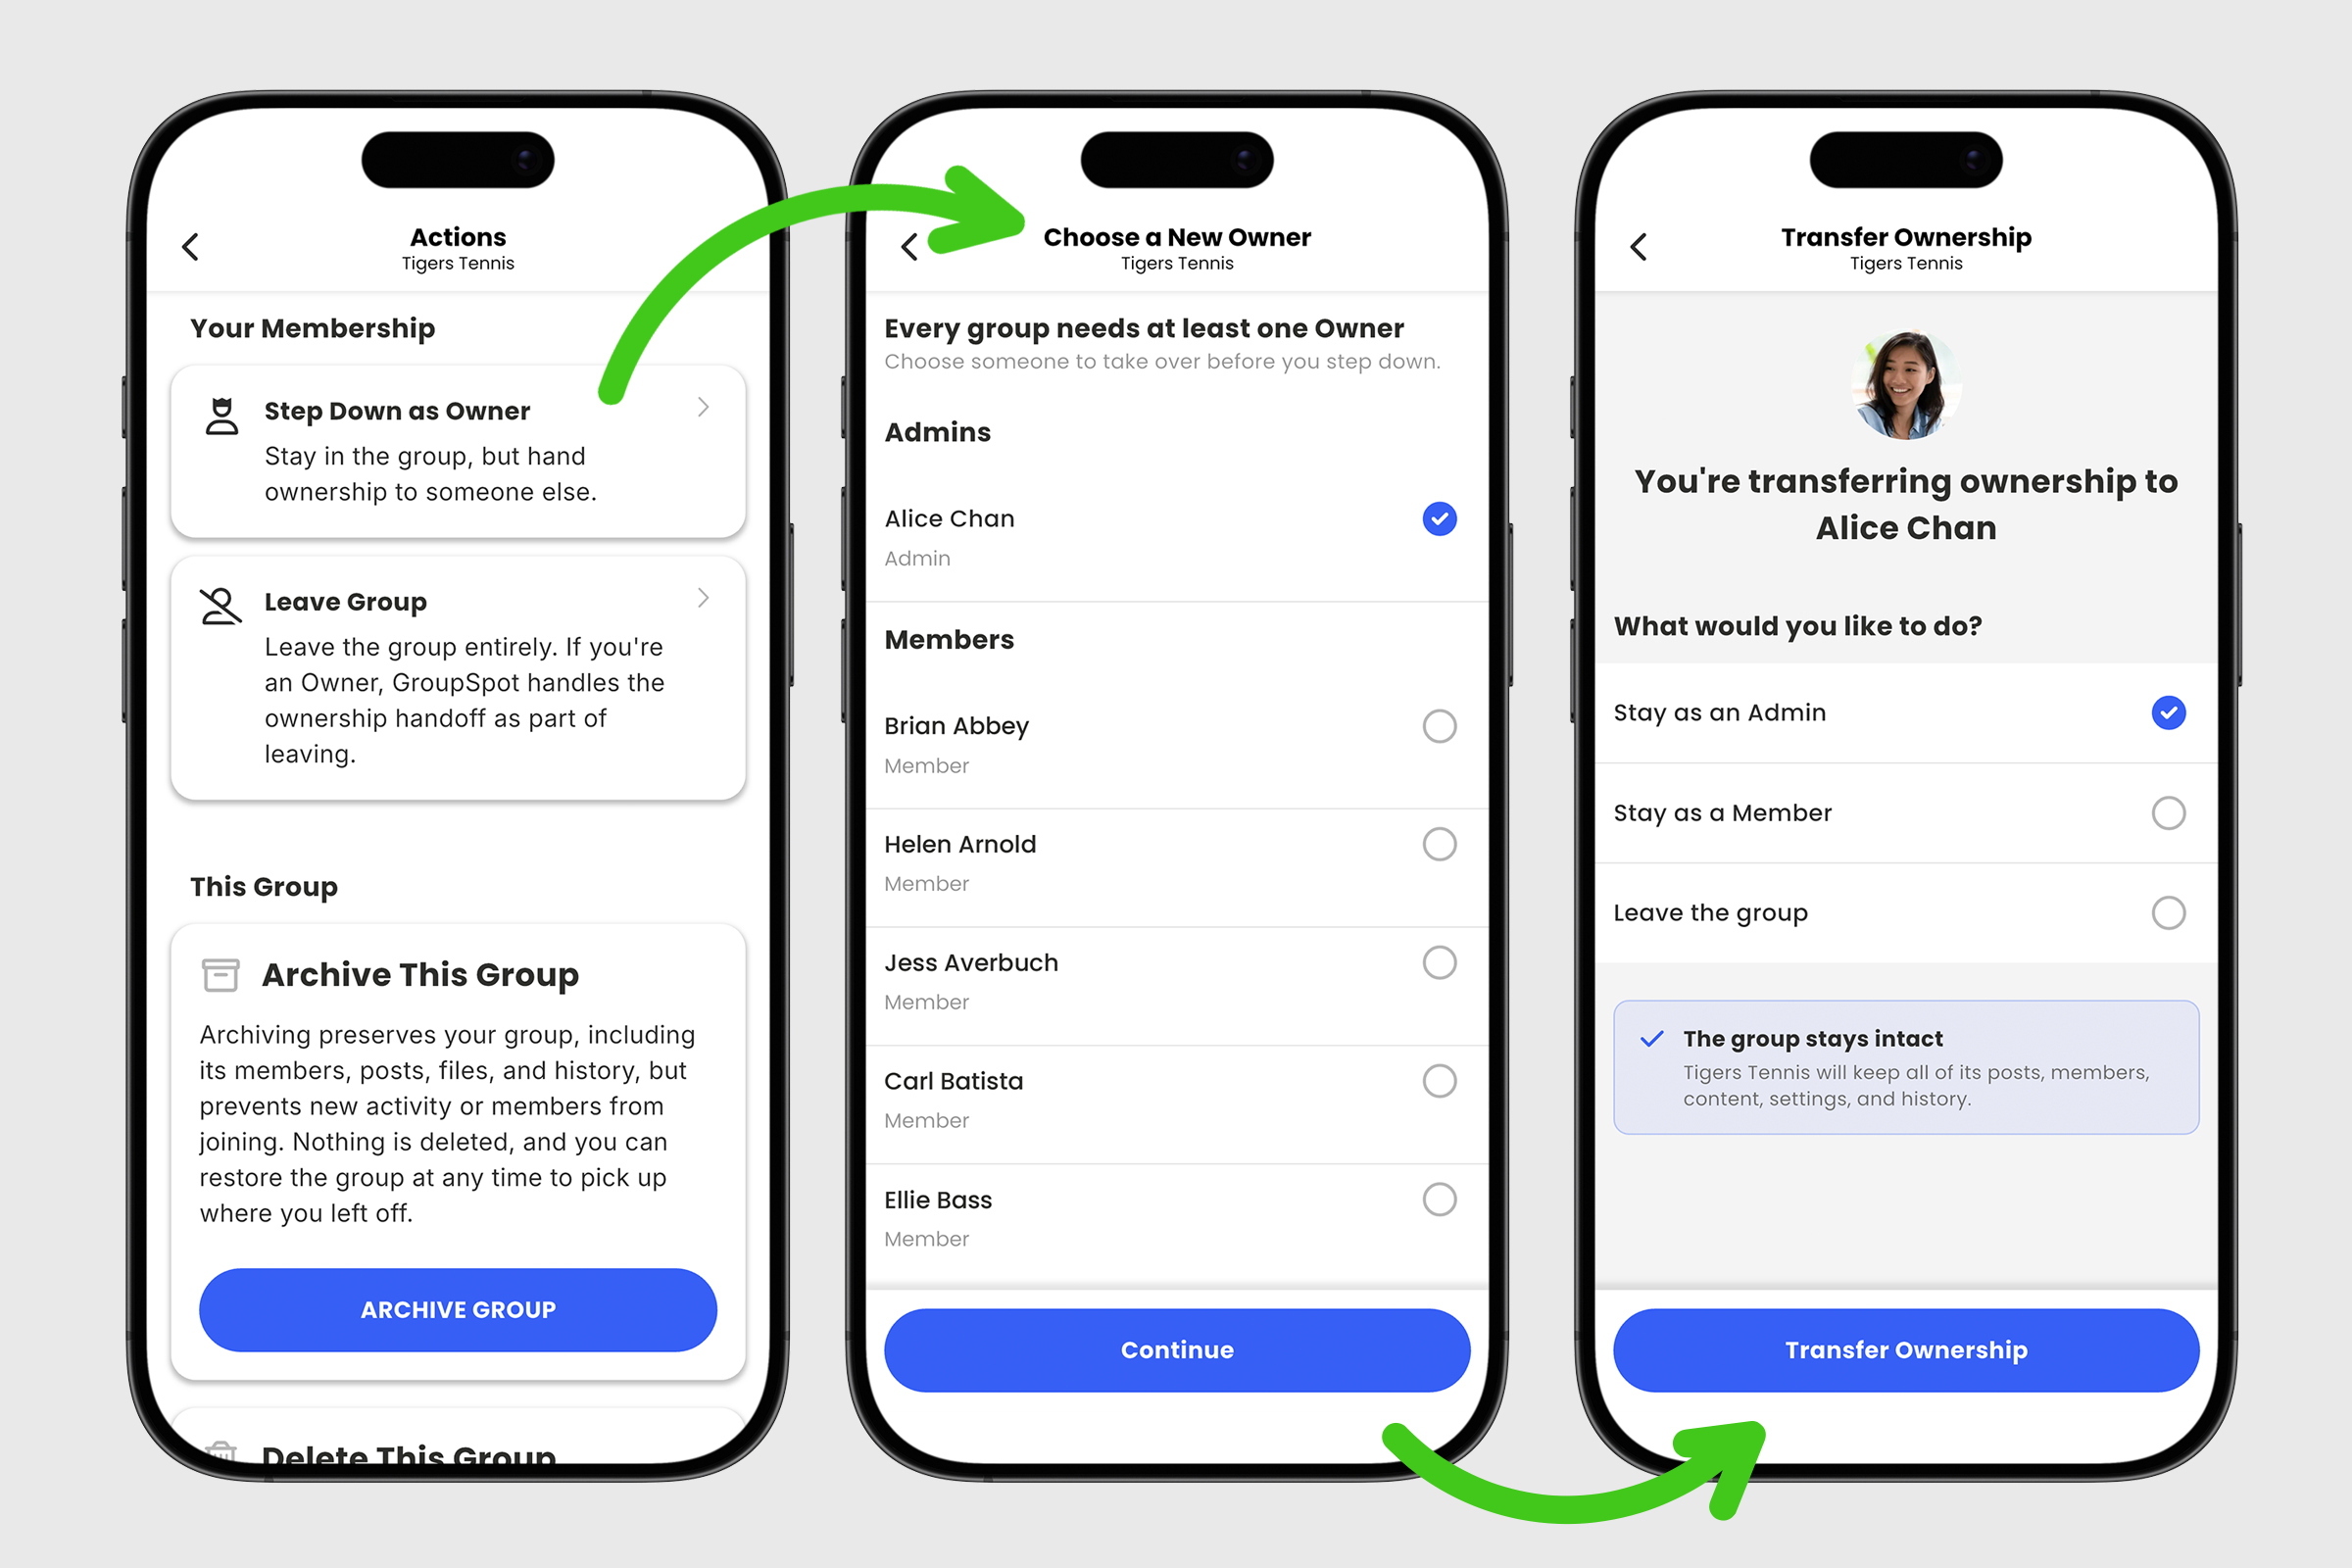
When your group has only one Owner, that Owner will need to promote an Admin or Member to take over as part of the transition. Following the same process above, the single Owner will see a different screen when they select Step Down as Owner. This screen will display a list of Admins and Members who can be promoted to Owner.
Select the person you want to replace you as Owner and tap Continue. Once the new Owner is selected, you can choose whether you want to remain in the group as an Admin, Member, or leave the group altogether. Once you’ve made your selection, tap Transfer Ownership, then tap Got It to complete the transition.
During this transition from one leadership team to the next, there are a few best practices that should be passed down to the new Owners. The most important thing for any new Owner is making sure your members can get in touch with you when they need to. This means opening your profile from your Member Directory, updating your personal contact details, and then making this information visible to your membership.
Another important adjustment for any new Owner just getting started is handling invites and approving new members into your group. Invites are easy to take action in a variety of ways. The two easiest ways to mass invite is by sending an email invite or sharing a QR Code. Both can be accessed through Invite either in your group menu or the ••• menu from your group’s home screen. Just hit the blue Invite Members button, and you will see three options to invite: a) Share b) Copy Invite Link and c) download PDF Flyer.
Once invites are sent, you will start receiving push notifications with new member requests to join. If you miss the push notification, you will see a blue badge on the bell icon in your lower navigation, indicating that you have new notifications. Go ahead and open the new notification and then click the blue Manage Request button.
If your group has membership questions, you will see the person’s answers to those questions which will likely give you enough information to know whether to admit the person or not. If you need to update the questions to your liking or maybe add more questions, it’s simple to do. From your Settings, choose Privacy and then Membership Questions. There you can add, edit, and even sort your questions. These membership questions are great guardrails to help ensure you are approving the right people into the group.
Another important feature for new Owners and Admins is subgroups. If your group uses subgroups, smaller groups within the larger group, you will want to make sure your members are assigned to the right subgroups. It’s easy to see who is assigned to which subgroup. From your Settings, choose Organization, then Subgroups, and Assign Subgroups to Members. There you will see your members listed in alphabetical order and you can select and deselect which groups. If you are running a team and using the roster feature, you can assign subgroups to the players as well. Subgroups are also great when sending mass communications. They allow you to tailor your communications so your message hits the right group.

Creating Seasons
Finally, if you’re an Owner of a team and you have seasons, you will want to share with your new Owner/Admin how to create seasons. From your Settings, choose Seasons, and end the current season and create the new season. When you end the current season, the schedule, results, and roster will be assigned to that season. When you create the new season, you can add your new schedule and roster. You can even clone the roster for the new season to save time.
GroupSpot prides itself on the utility it provides to Owners and Amins running large, organized groups. Being aware of these tips and tricks will make the transition from one leadership team to the next seamless, and it gives the new regime a running start.


