GroupSpot Premium is GroupSpot’s paid subscription tier that unlocks expanded services and advanced features for power admins running more demanding groups. Admins can choose between monthly or annual billing and can hold multiple subscriptions across different groups. There are two ways to get started, through your profile or directly from a group. Let’s look at both:
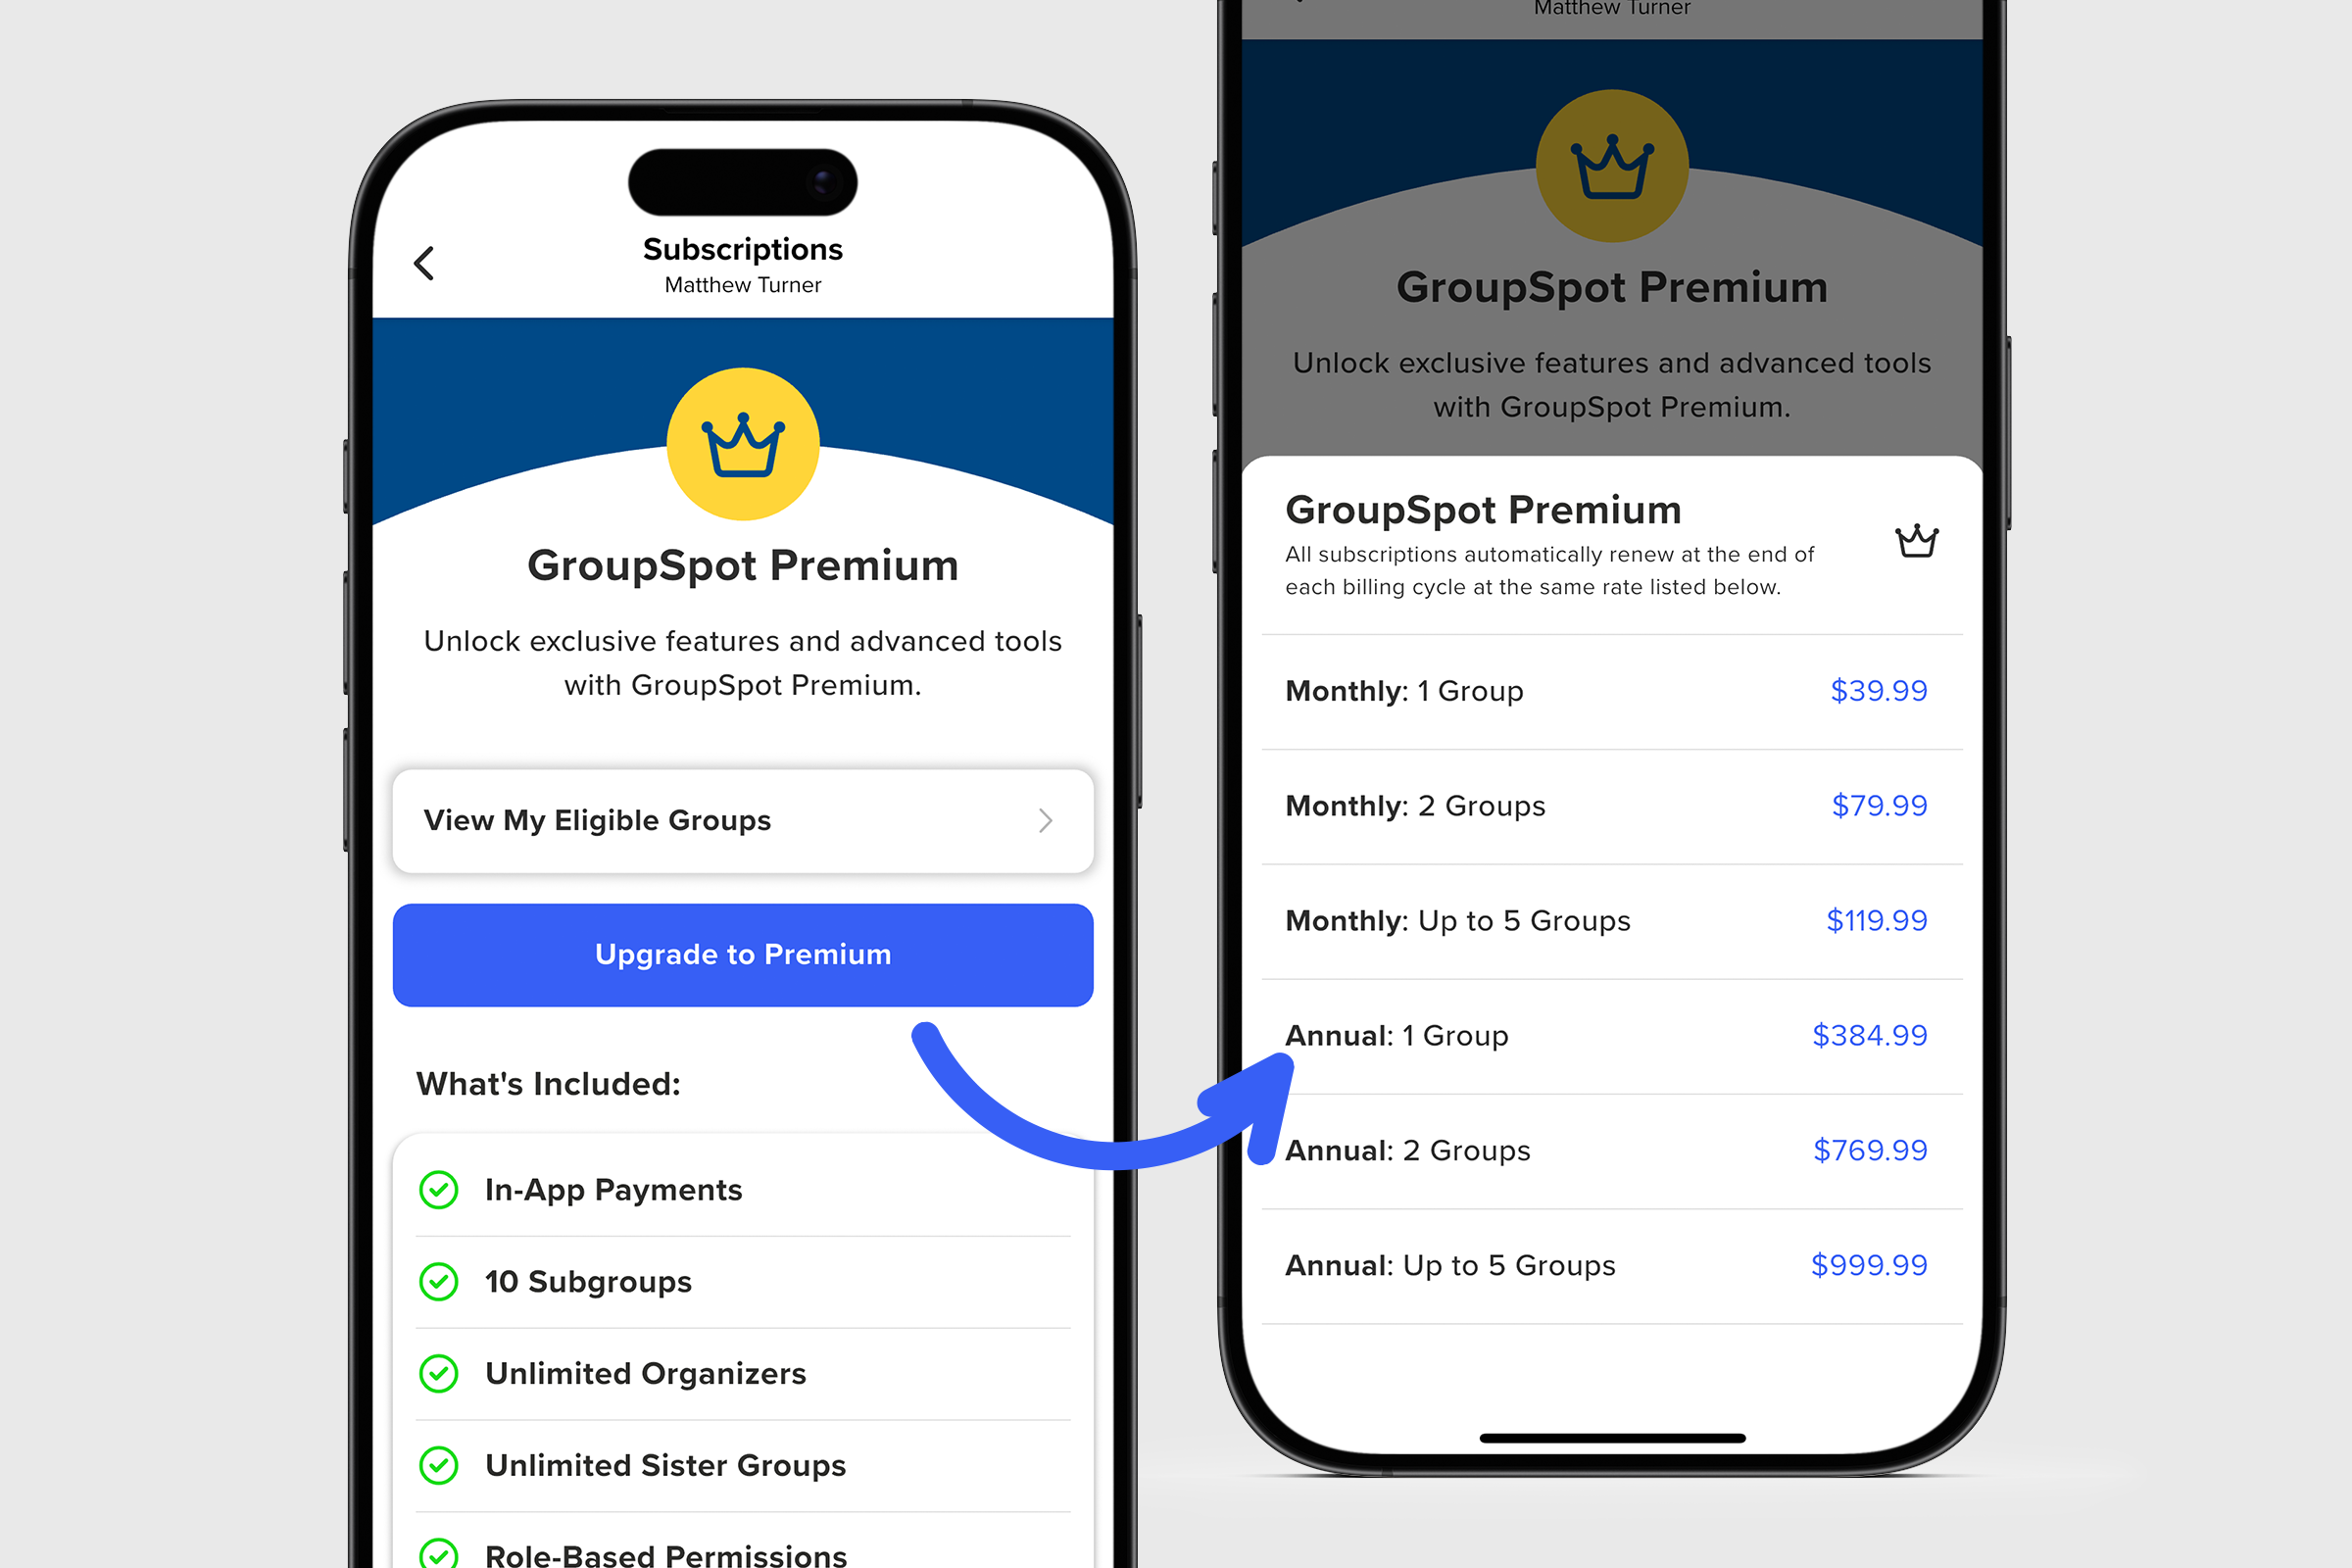
For admins new to Premium, getting started is easy. From your list of groups, tap on the circular profile icon in the upper navigation. You will arrive at a welcome screen which highlights what’s included in GroupSpot Premium and a big blue Upgrade to Premium button. If you’re an admin with more than one group, you will have an additional row, View My Eligible Groups, where you can see all the groups you run which can be upgraded to Premium. Let’s review each step:
1. From your list of groups, tap the Profile Icon.
2. Tap Subscriptions at the top of the menu.
3. Tap on the blue button Upgrade to Premium.
4. Select a monthly or annual plan that fits your needs. You can select up to a five group subscription. If you need more than a five group subscription, that requires a conversation with GroupSpot’s sales team at sales@groupspot.app.
5. Once you’ve chosen your subscription plan, you will need to fill out your details (email address, card number, expiration date, security code, country code and zip code) to complete your purchase.
6. Once the payment information has been provided, tap on the blue Pay Now button.
7. Once successful, you will receive a payment complete message. Tap the blue Continue button.
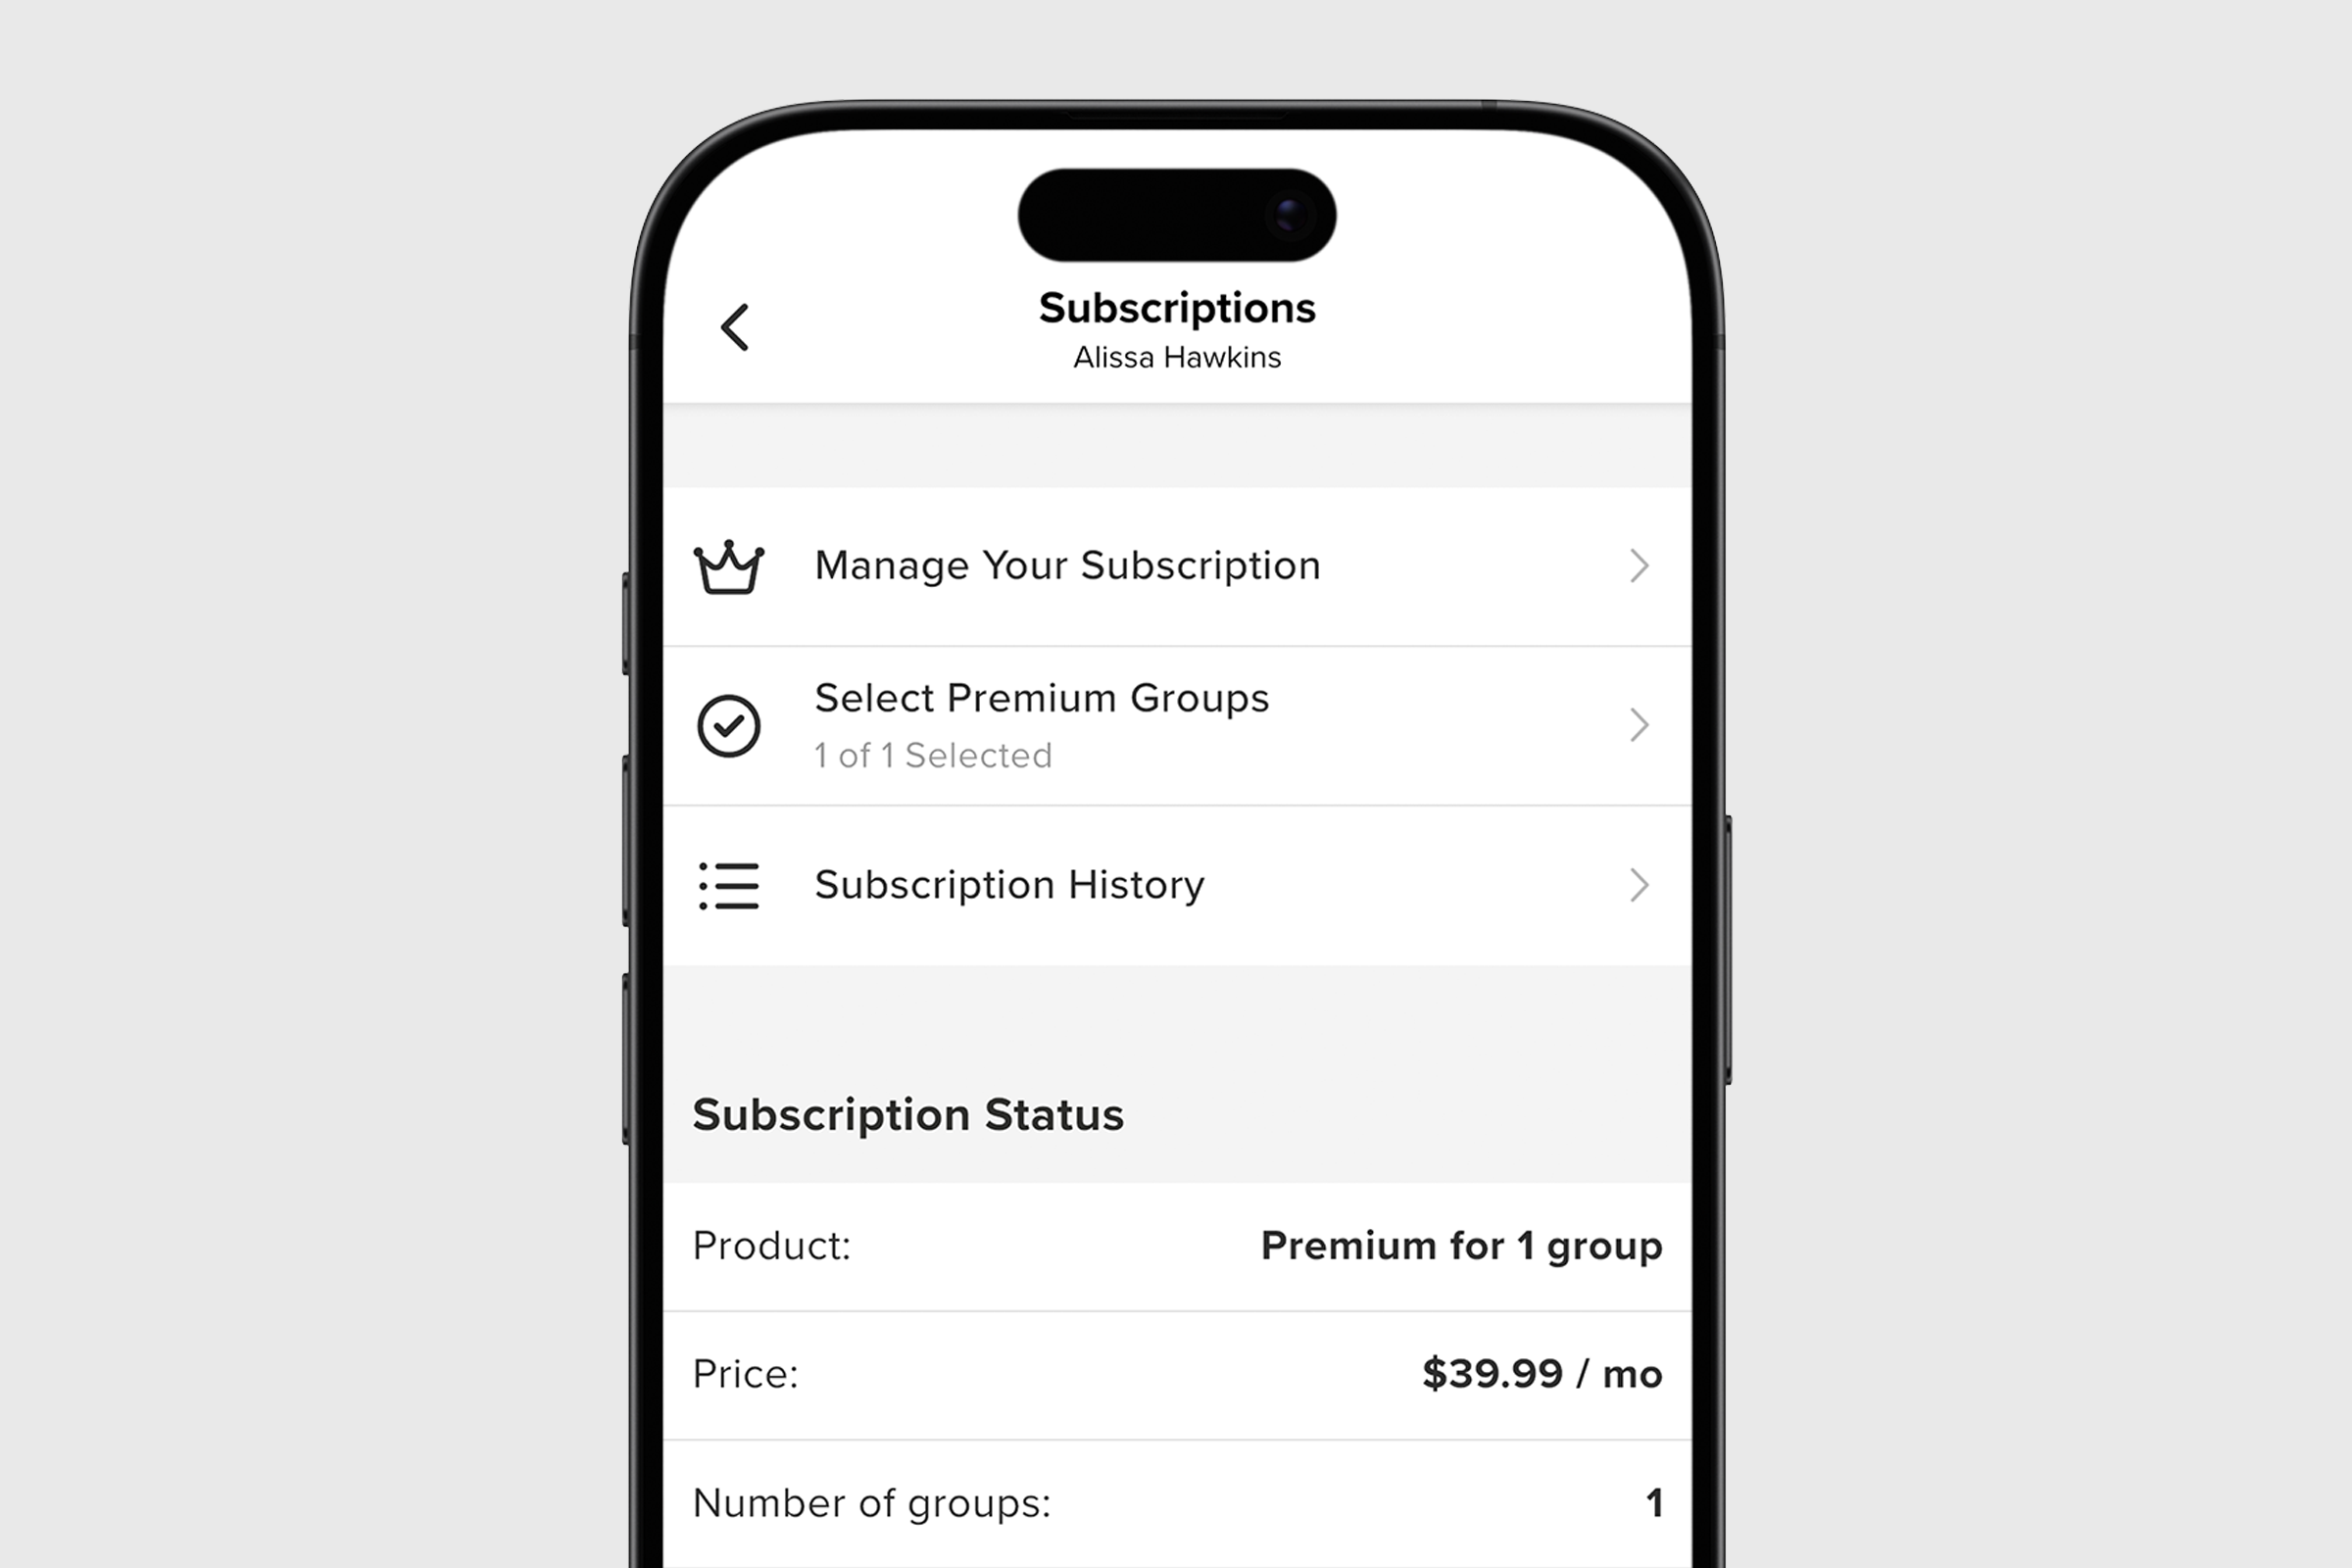
8. Now that you’ve subscribed to Premium, you can select the group(s) which you want to elevate to Premium by tapping on Select Premium Groups.
9. From the list of groups, choose the group by ticking the checkbox and then tap the green SAVE button.
10. At this point, your group will now have access to the expanded services and advanced features of GroupSpot Premium.
11. One important caveat is that for admins looking to turn on in-app payments once your new subscription is active, you will need to locate Payments from their Group Settings and walk through the required steps to turn that feature on. Once you do, you will have access to the full gamut of GroupSpot Premium’s offering.
For admins who already manage a Premium group:
When you tap the Profile Icon and select Subscriptions, you’ll see a slightly different screen. Tap Manage Your Subscription to reach the Premium welcome screen, where you can add another group to your plan.
You can also upgrade to Premium directly from inside any group. Here are the steps to follow:
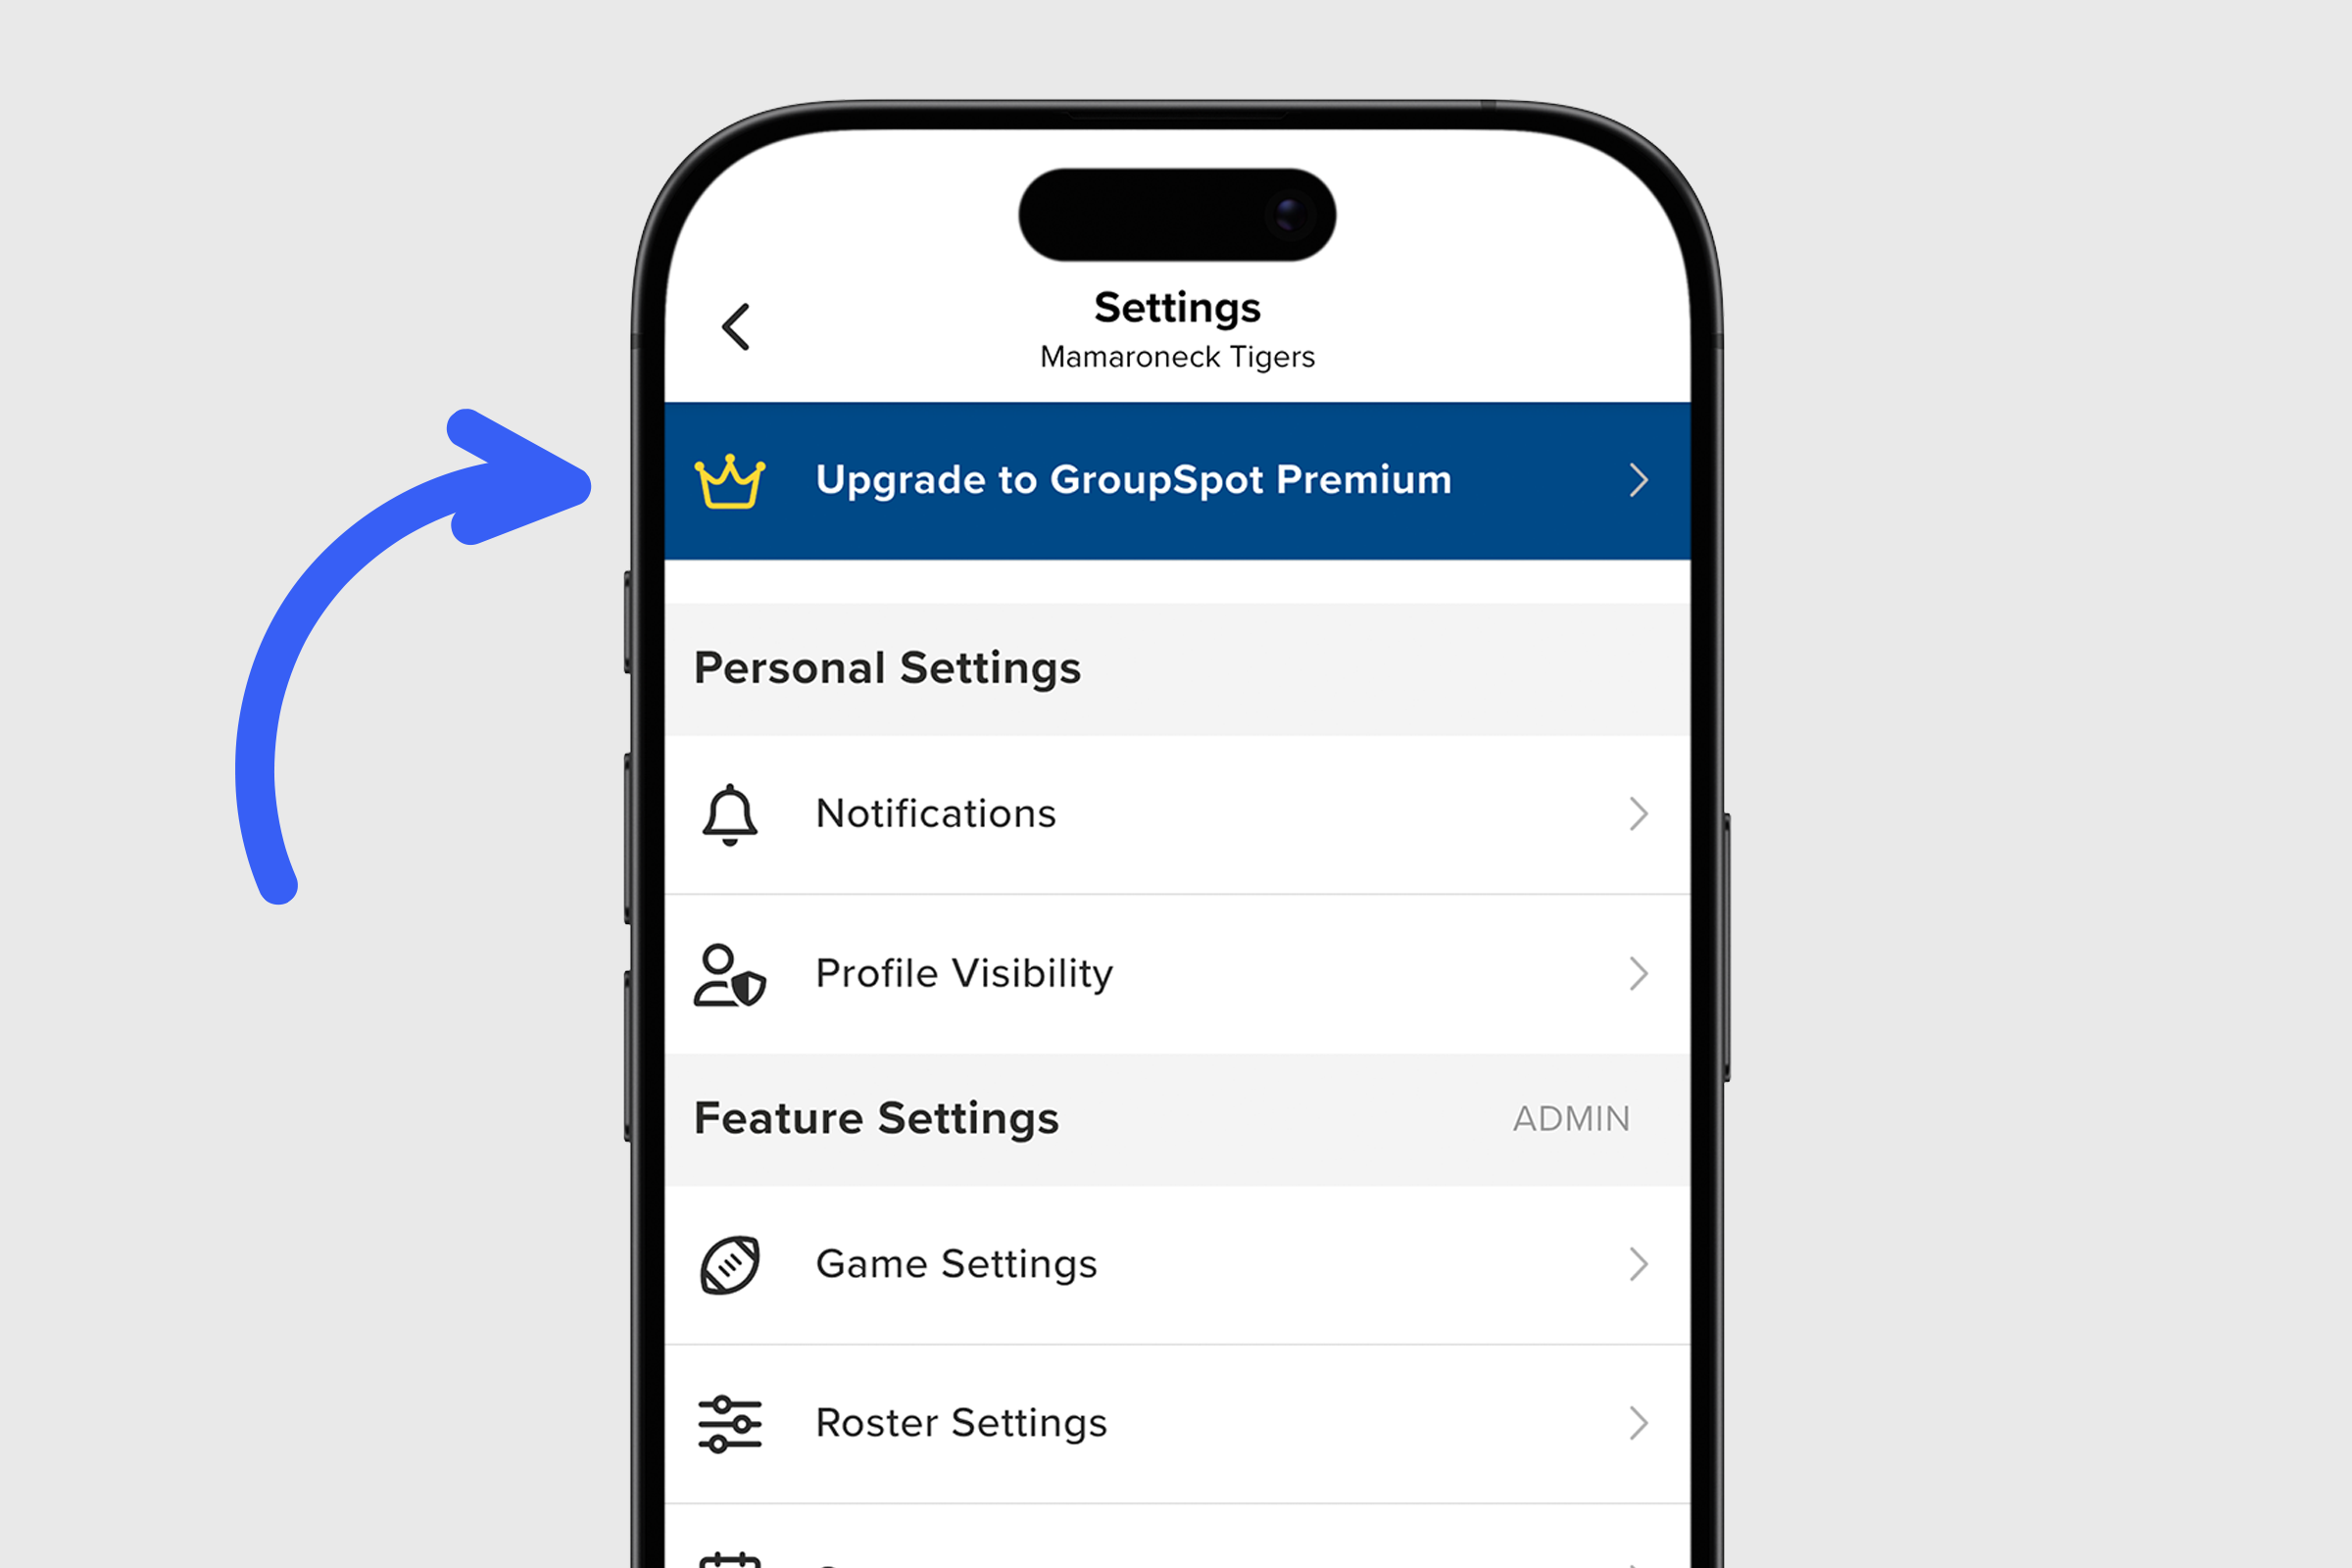
1. From your group menu, tap on Group Settings.
2. At the very top of the screen, tap on the Upgrade to GroupSpot Premium row.
3. Alternatively, you can also tap on Get Premium from the menu list to get started. Here you will notice a second row that tells you the status of your current plan. For new groups, you will see Current Plan: Starter (Free). For older groups who were created before GroupSpot Premium existed, they will see Current Plan: Legacy (Free).
4. Either way, you will arrive at the Get GroupSpot Premium arrival screen where you would tap the blue Upgrade to Premium button and follow the steps above.
Follow these steps to unlock GroupSpot Premium and give your group access to its most powerful tools and features.
