Payments are easy to add to a post once Payments have been turned on. They work great for tickets, merchandise sales, dues and everything in between.
Payments work exactly like other add-ons such as signups, forms, and polls, which can be added to any post. The entire Payment setup takes place either during the post creation process or can be added to existing posts after the fact.
Here’s your step-by-step guide to add a Payment to a Post:
1. Create your post or event by tapping the blue post icon.
2. Once you’ve selected your post type, tap on the + to view the list of add-ons and choose Payment.
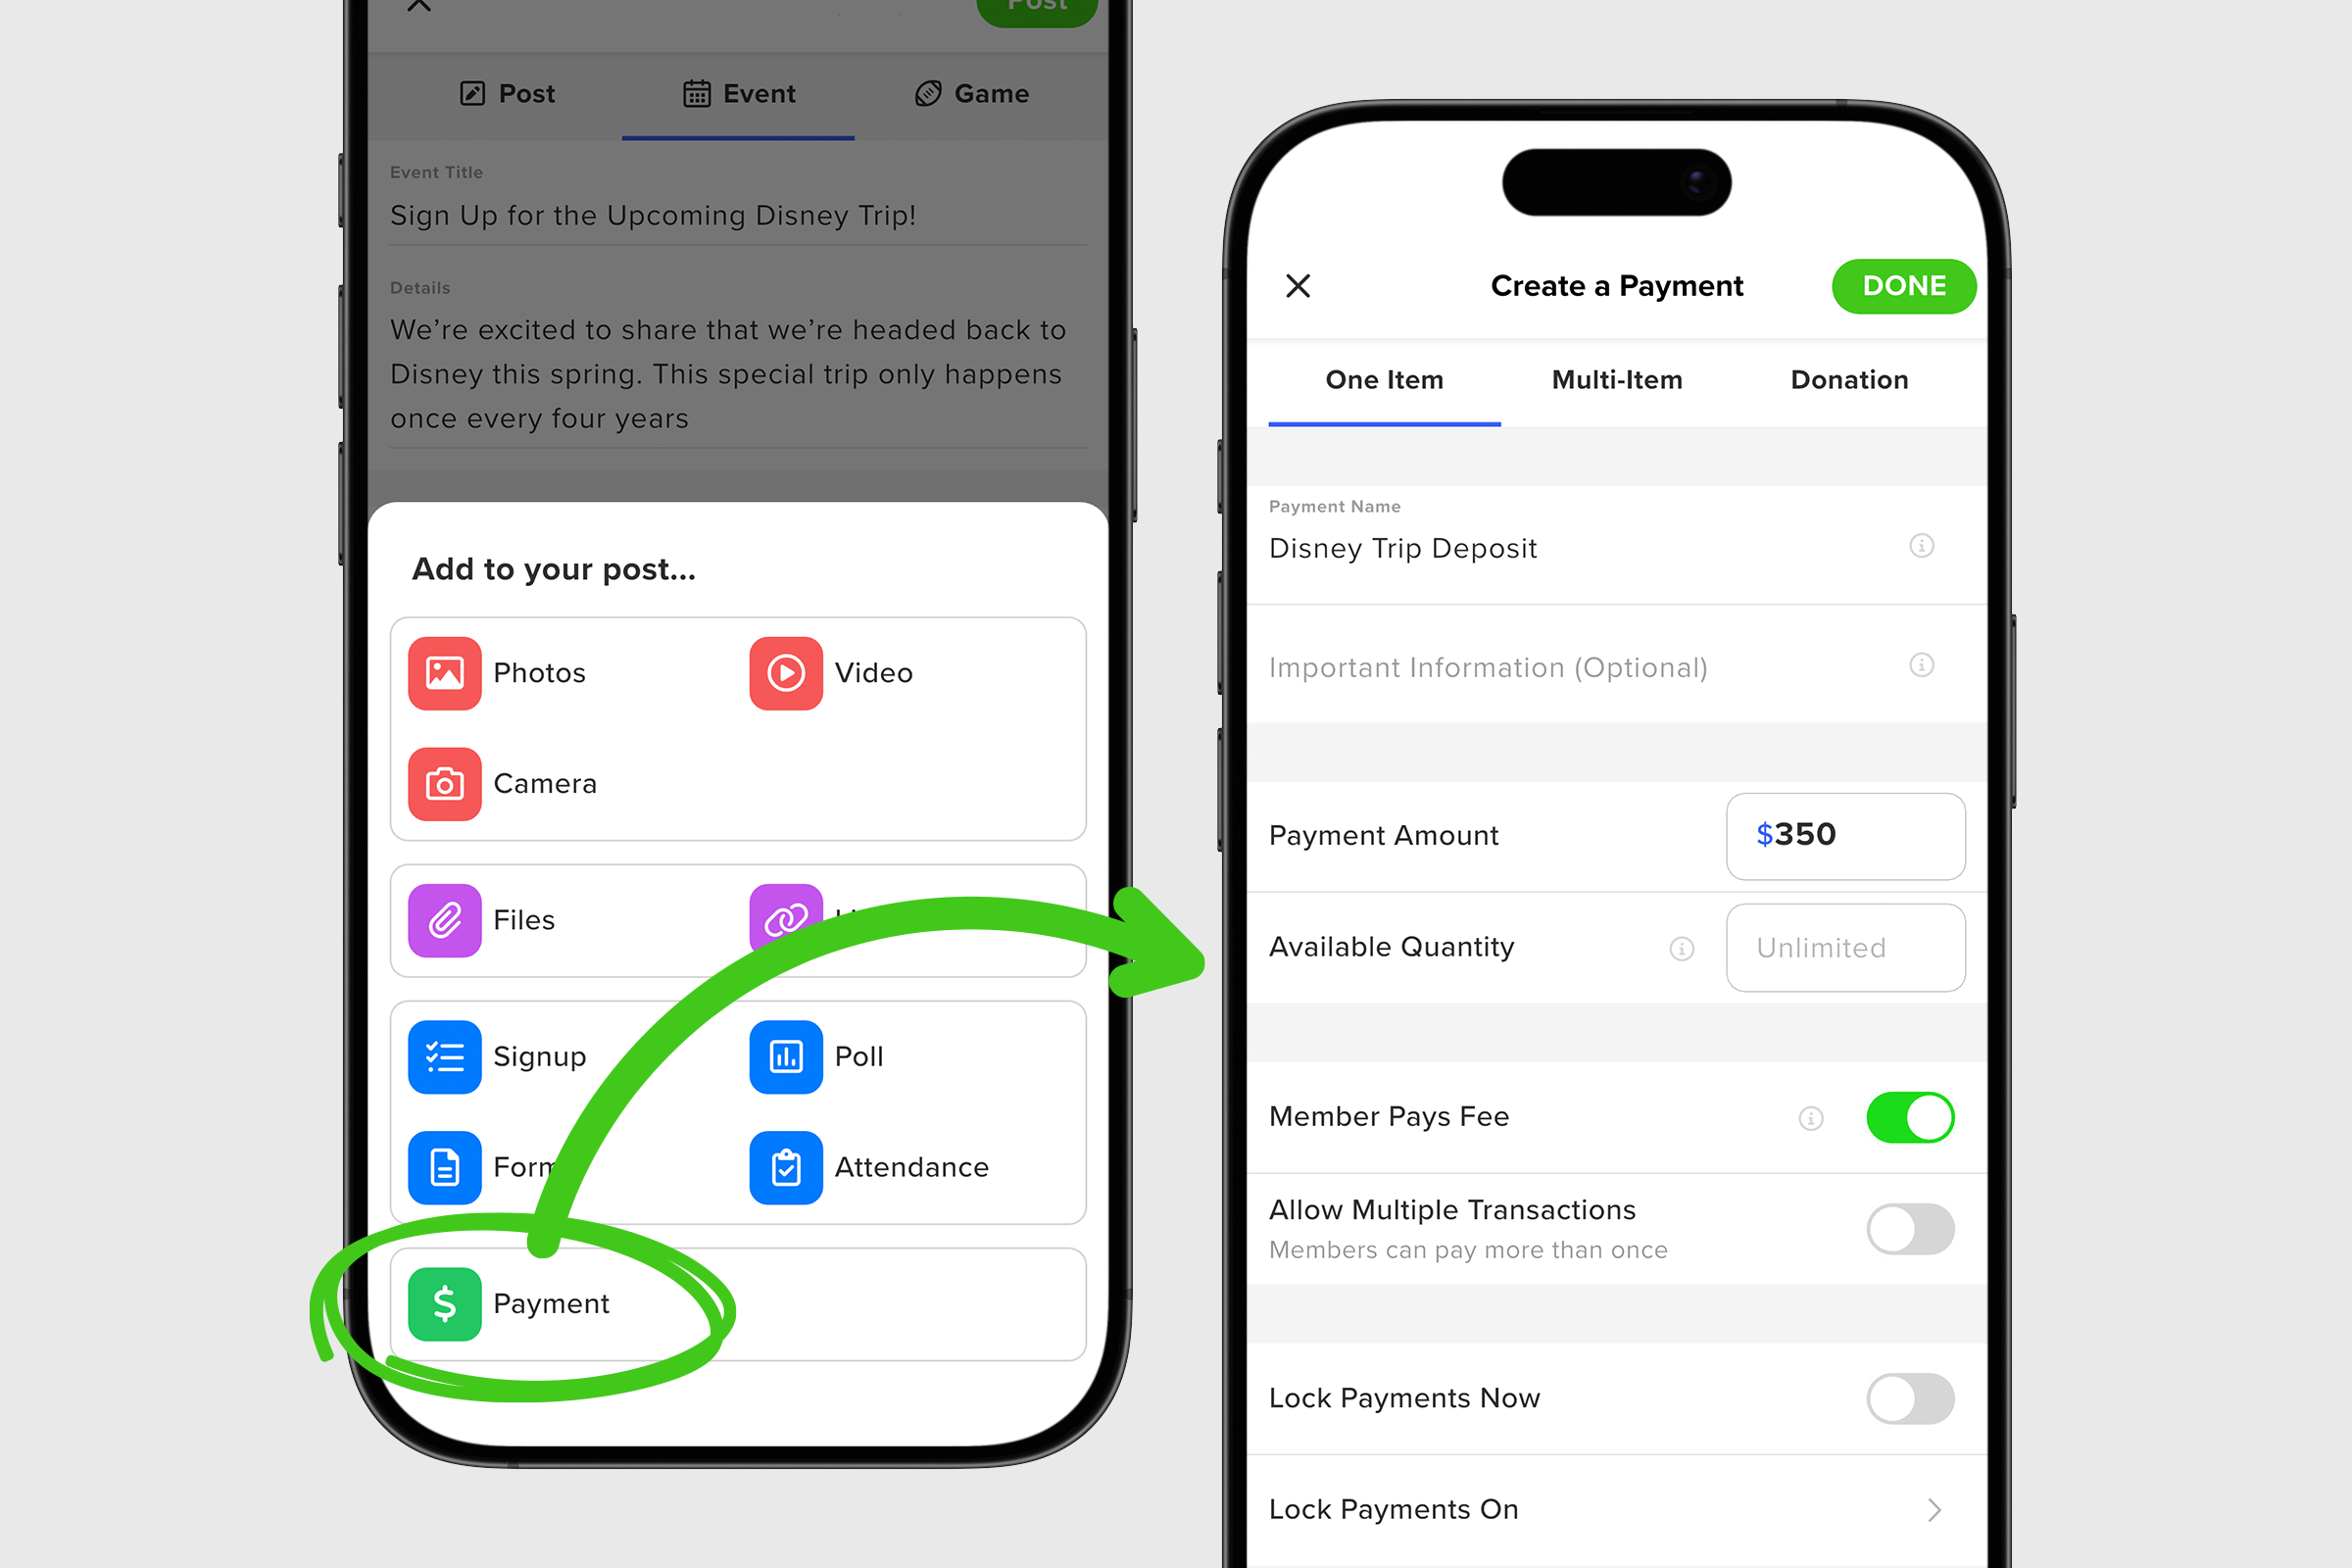
3. On the next screen, start by choosing your type of payment from the tabs in the upper navigation: One Item, Multi-Item, or Donation.
4. Next add a required Payment Name. It’s important to be as specific as possible since this is what members see.
5. Add any Important Information that might be needed. This is an optional field, but it allows admins the opportunity to provide any necessary extra direction before members make their purchase.
6. Add your Payment Amount and indicate an Available Quantity if applicable.
7. Choose who you want to cover the transaction fee, the group or the individual members. By default, members cover the fee but this can easily be switched.
8. Next, you have the option to toggle on Allow Multiple Transactions. This is defaulted to off but can easily be toggled on if chosen.
9. Finally, you can Lock Payments Now to disable further payments if you so choose. Or you can set a date to lock the payment by tapping on Lock Payments On row.
10. Now that you’ve filled out the Payment details, tap DONE to return to the post creation screen.
11. Fill in any other information or details associated with this post, and tap Post to publish.

Once published, your post will feature a blue PAY button which, when tapped, initiates the payment process for members on the item for sale.
